Blog

How to reset Sql server password?

For resetting sql server password there are several ways depending on the access you have.Below are the diffrent method to reset the password.

1: Open command prompt in administrator mode:

1.1:If you have forgotten the SQL Server password, you can reset it using the command prompt by following these steps:

  • Open Command Prompt.
  • Connect to your SQL Server instance using the sqlcmd utility
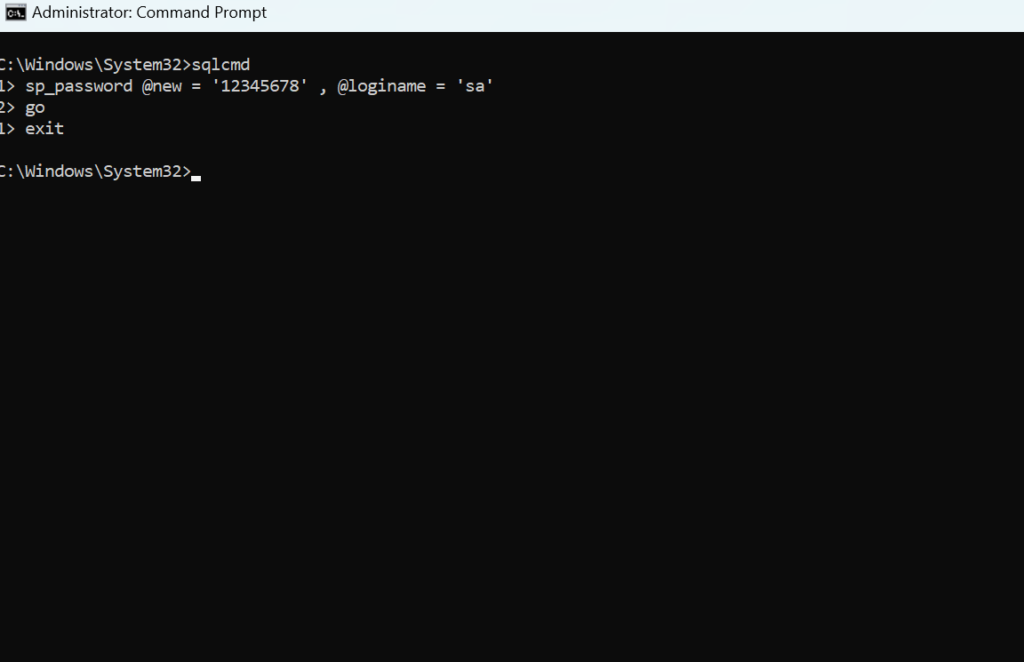
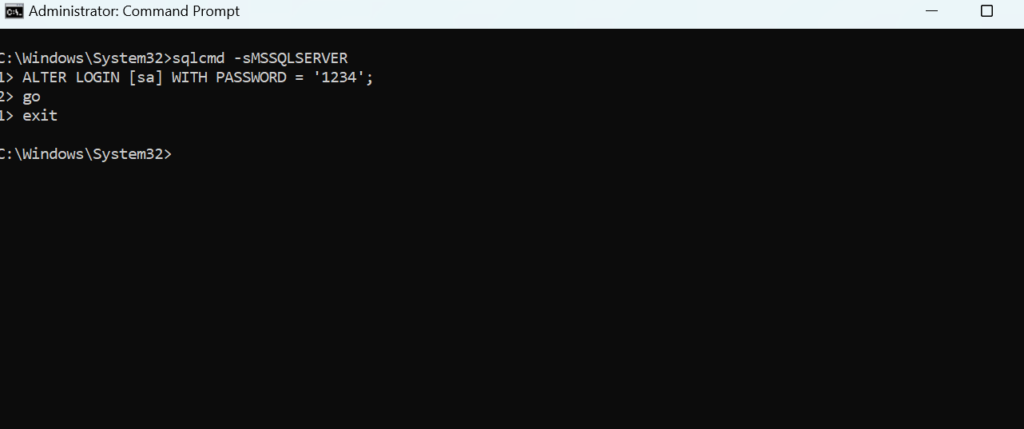
1.2:Goto Sql services and right click and go to property then copy server instance(-sMSSQLSERVER) name then execute below command in cmd as Adminstrator mode:

  • sqlcmd -sMSSQLSERVER
  • ALTER LOGIN [sa] WITH PASSWORD = ‘NewPassword’;
  • go
  • exit

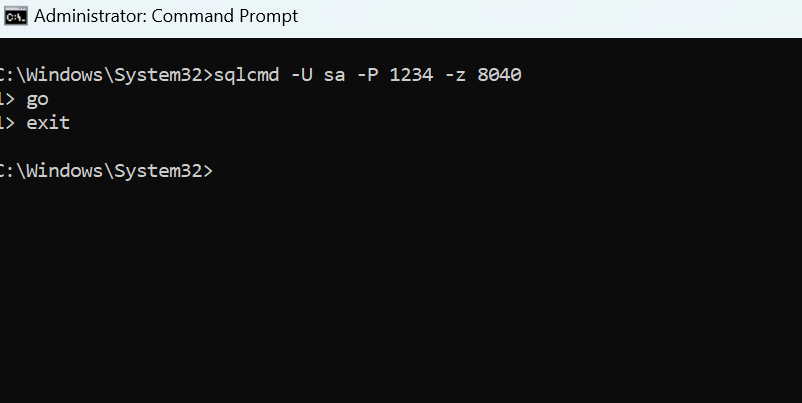
1.3:It’s an another way for you to use SQLCMD utility to modify password if you remember the old sa password but want to reset new password but in more simplest way you can use SSMS to reset the password . Follow the steps below, executing SQLCMD commands in command prompt to set a new password.

  1. Run up the Command Prompt as Adminstrator mode.
  2. type command :sqlcmd -U someuser -P currentpassword -z newpassword.
  3. go
  4. exit

2.Reset the password using SQL Server Management Studio(SSMS).

  • Open SQL Server Management Studio (SSMS).
  • Connect to the SQL Server instance.
  • Expand the Security folder.
  • Expand the Logins folder.
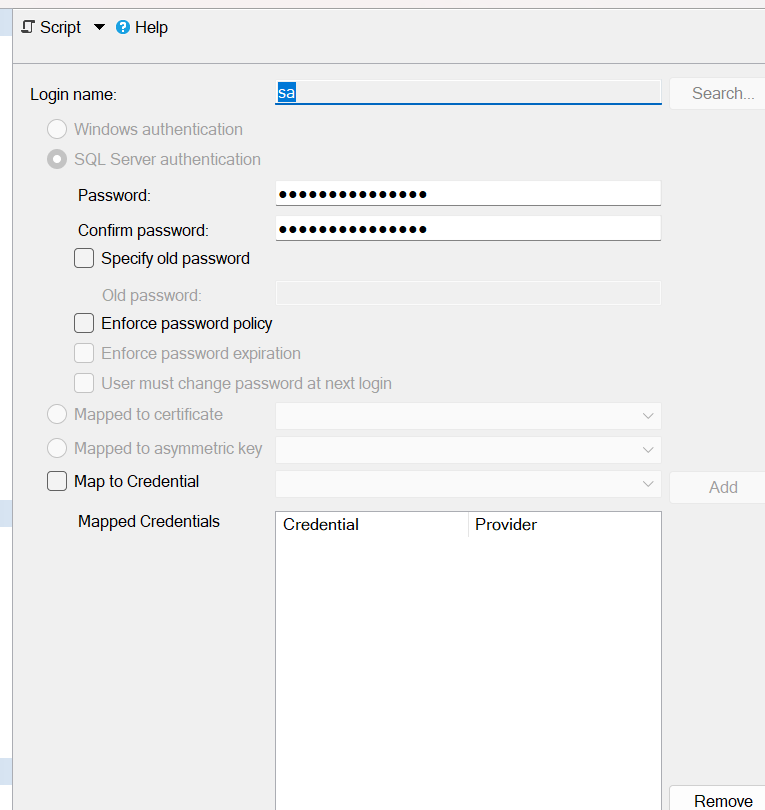
  • Right-click on the login for which you want to reset the password and select Properties.
  • In the Login Properties window, enter the new password in the Password and Confirm password fields.
  • Click OK.
  • Using T-SQL
  • If you have access to the SQL Server and can execute T-SQL commands
  • Connect to the SQL Server instance.
  • Execute the following T-SQL command:
  • ALTER LOGIN [YourLoginName] WITH PASSWORD = ‘NewPassword’;
  • Replace YourLoginName with the login name and NewPassword with the new password you want to set.

Summary:Resetting a SQL Server password can be done using SSMS, T-SQL, command-line tools, or by sqlcmd utility. The appropriate method depends on the access and permissions you have. If you have administrative privileges, using SSMS or T-SQL is straightforward. If you are completely locked out,then you can use sqlcmd utility.
A network-related or instance-specific error occurred while establishing a connection to SQL Server

A network-related or instance-specific error occurred while establishing a connection to SQL Server. The server was not found or was not accessible. Verify that the instance name is correct and that SQL Server is configured to allow remote connections. (provider: Named Pipes Provider, error: 40 – Could not open a connection to SQL Server)

This can be due to various reasons ranging from network issues, server settings, incorrect connection strings, or even SQL Server service issues. Here are some common steps to troubleshoot and resolve this issue:

1.Verify SQL Server is Running

Ensure that the SQL Server service is running on the server.

  • Open SQL Server Configuration Manager.
  • Check the status of the SQL Server service.
  • If the service is not running, start it.

2.Check SQL Server Instance Name

Ensure that SQL Server is configured to allow remote connections.

  • Open SQL Server Management Studio (SSMS).
  • Right-click on the server instance and select Properties.
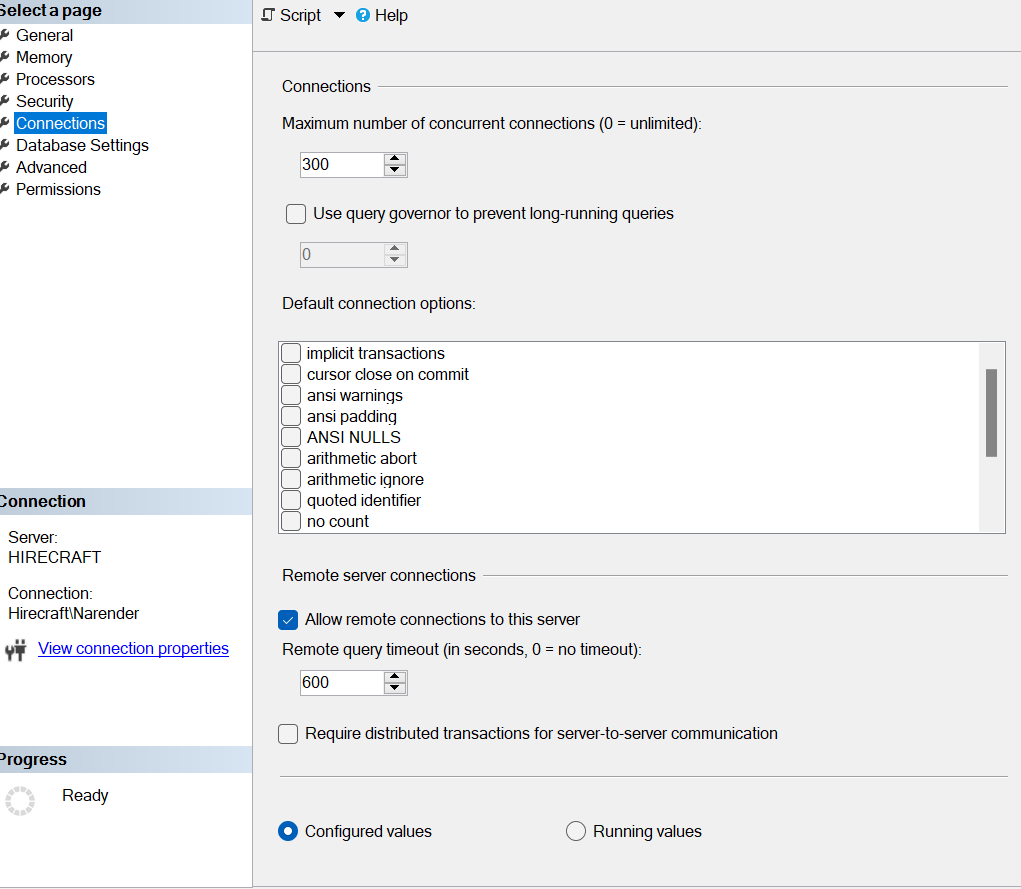
  • Go to the Connections page and ensure that Allow remote connections to this server is checked

3.Verify SQL Server Configuration

Ensure that SQL Server is configured to allow remote connections.

  • Open SQL Server Management Studio (SSMS).
  • Right-click on the server instance and select Properties.
  • Go to the Connections page and ensure that Allow remote connections to this server is checked.

4.Check SQL Server Network Configuration

Ensure that SQL Server is configured with the appropriate network protocols.

  • Open SQL Server Configuration Manager.
  • Expand SQL Server Network Configuration.
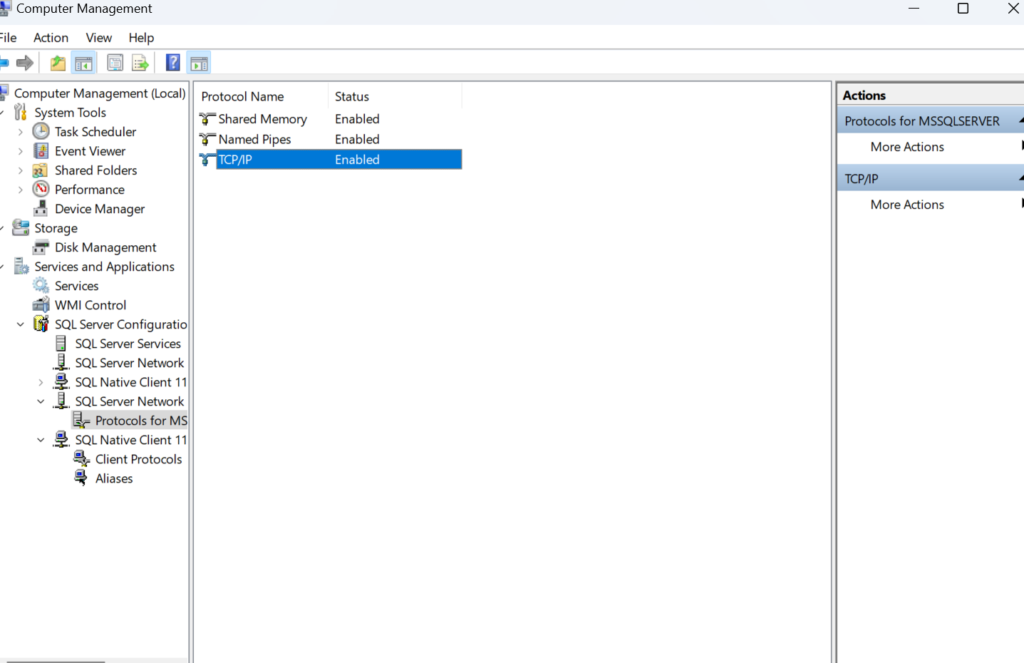
  • Click on Protocols for InstanceName.
    • Ensure that TCP/IP is enabled.
    • If TCP/IP is enabled, right-click on it and select Properties. In the IP Addresses tab, ensure that TCP/IP is enabled for all appropriate IP addresses.

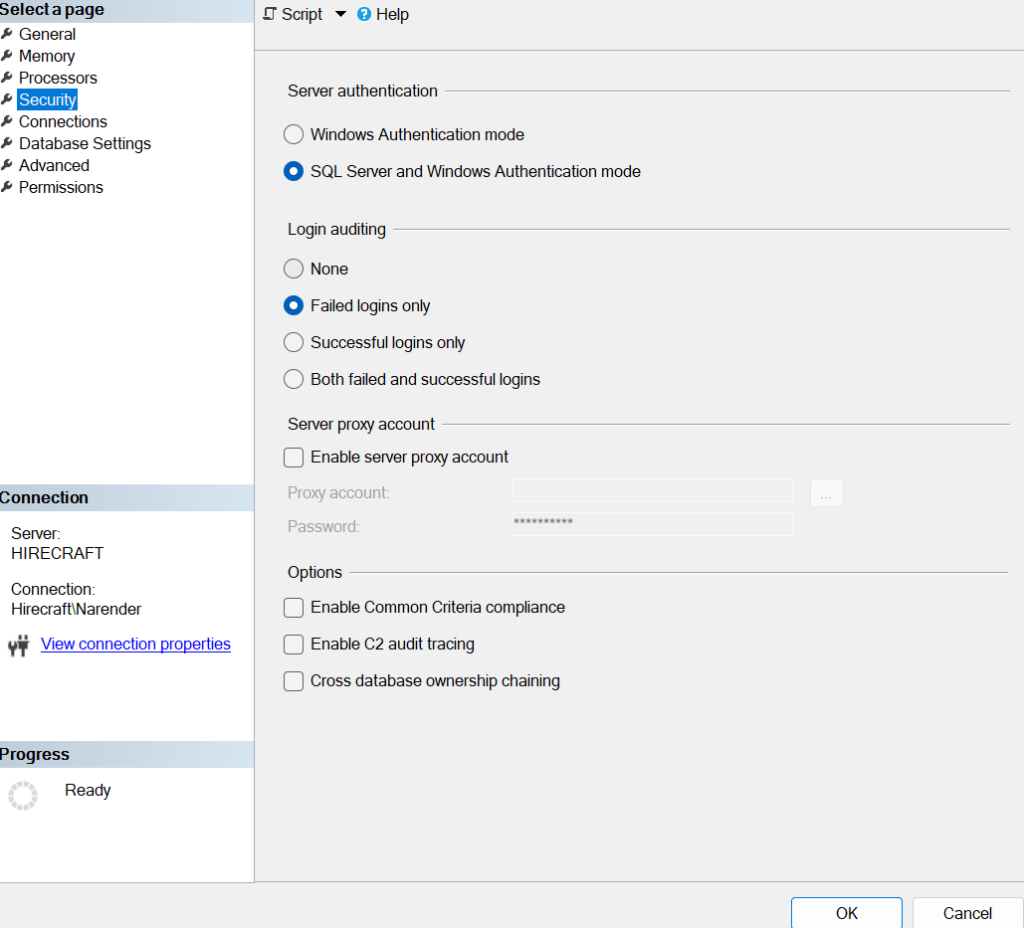
5.Verify SQL Server Authentication

Ensure that the SQL Server authentication mode and credentials are correct.

  • Open SSMS.
  • Right-click on the server instance and select Properties.
  • Go to the Security page and ensure that the Server authentication mode is set correctly like SQL Server and Windows Authentication mode.

Summary

To resolve network-related or instance-specific connection errors in SQL Server, follow a systematic troubleshooting approach to verify that the SQL Server service is running, network protocols are enabled, firewall settings are correct, authentication settings are appropriate, and connection strings are accurate. Additionally, checking SQL Server logs and testing connectivity.

How to check Table structure in SQL Server?

We can use several methods to check table definition or structure, including SQL Server Management Studio (SSMS) or T-SQL queries.

Method 1: Using SQL Server Management Studio (SSMS)

  • Launch SQL Server Management Studio and connect to your SQL Server instance.
    Expand Databases In the Object Explorer and Find the Table and Expand the Tables node to see the list of tables in the database.View Table Definition:
  • Right-click on the table whose definition you want to check.
    Select Design. This will open the table in the design view where you can see the columns, data types, and other properties.

Method 2: Using T-SQL Queries:

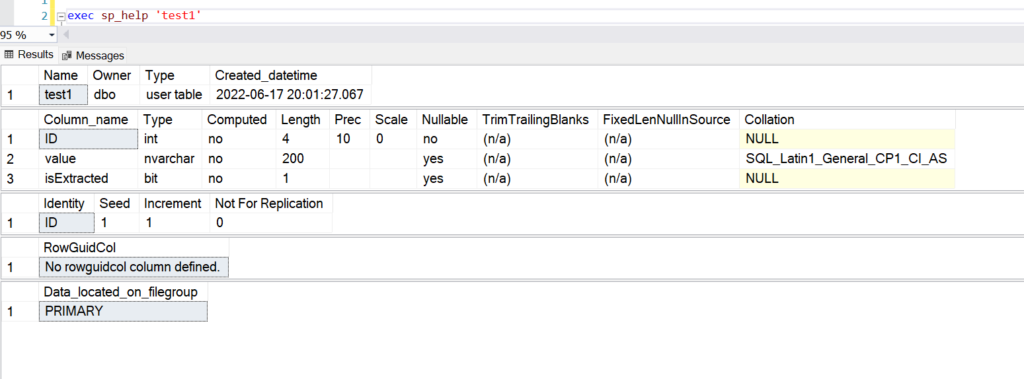
  • EXEC sp_help ‘YourTableName’

There are several other mentod to genrate table script these are listed below.

1.Using INFORMATION_SCHEMA.COLUMNS View:

SELECT COLUMN_NAME, DATA_TYPE, CHARACTER_MAXIMUM_LENGTH, IS_NULLABLE
FROM INFORMATION_SCHEMA.COLUMNS
WHERE TABLE_NAME = ‘test’;

2.Using sys.columns and sys.tables System Catalog Views:

SELECT COLUMN_NAME, DATA_TYPE, CHARACTER_MAXIMUM_LENGTH, IS_NULLABLE
FROM INFORMATION_SCHEMA.COLUMNS
WHERE TABLE_NAME = ‘test’;

3.Using sys.columns and sys.types:

SELECT
c.name AS ColumnName,
t.name AS DataType,
c.max_length AS MaxLength,
c.precision,
c.scale,
c.is_nullable AS IsNullable,
c.is_identity AS IsIdentity
FROM
sys.columns c
INNER JOIN
sys.types t ON c.user_type_id = t.user_type_id
WHERE
c.object_id = OBJECT_ID(‘test’);

How to Download and Install MS SQL Server on Windows?

Downloading and installing SQL Server involves several steps. Below is a comprehensive guide for downloading and installing SQL Server 2022 Developer Edition, which is free to use for development and testing purposes and upto 10 GB of data we can save.

Step 1: Download SQL Server 2022 Developer Edition, Through Microsoft official website.

Go to the SQL Server download page>Visit the SQL Server downloads page>Select the Developer Edition>Under “Developer”, click the Download now button.

Step 2: Once the download is complete, ,Run the Installer.Choose Installation Type as Basic.

3.After click on basic click on Accept to setup installation path of server default it is install in c drive program folder.

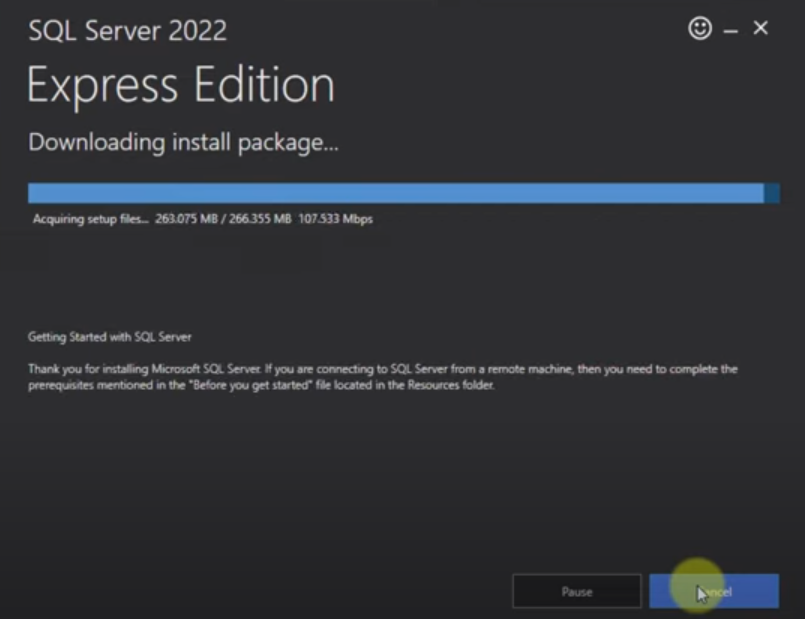
4.Then click on install it will download the package and installing.

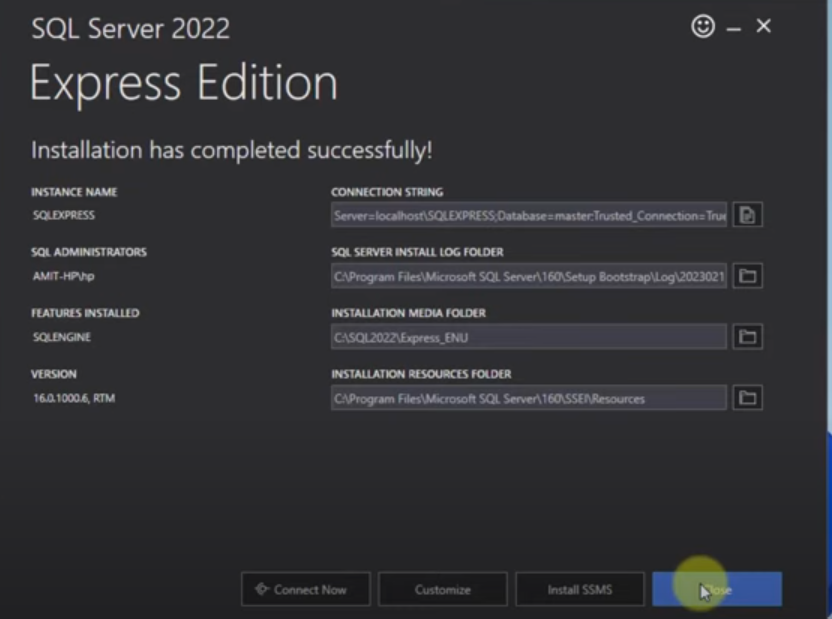
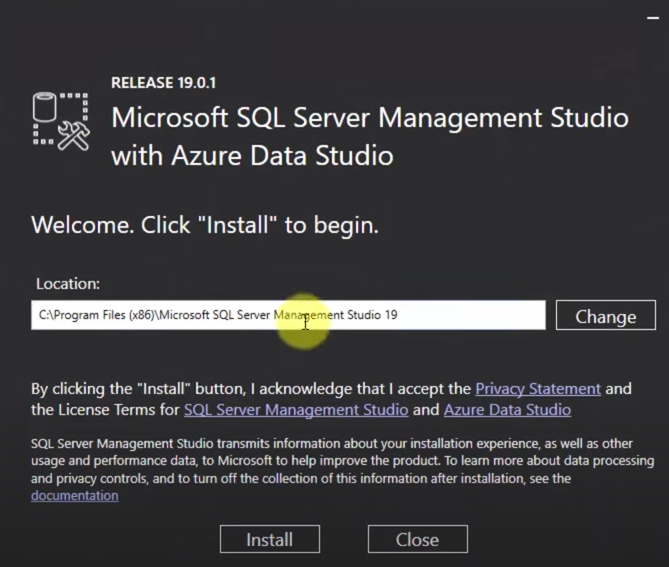
5.Once the installation is completed click on Install SQL Server Management Studio (SSMS).It will redirect to Microsoft Official website of SSMS there we will get latest version of SSMS .Download and run the EXE file .

6.Once installation complete .Connect to SQL Server .

  • Open SSMS and Connect to Server window, enter your server name (use localhost or . for the local instance)
  • Choose the authentication mode you configured during the installation (Windows Authentication is the default).
  • Start Using SQL Server:
  • Click Connect and you are ready to start using SQL Server.

Following these steps will install SQL Server 2022 Developer Edition along with SQL Server Management Studio, allowing you to develop and test your SQL Server applications. If you encounter any issues during installation, reach out for additional support.

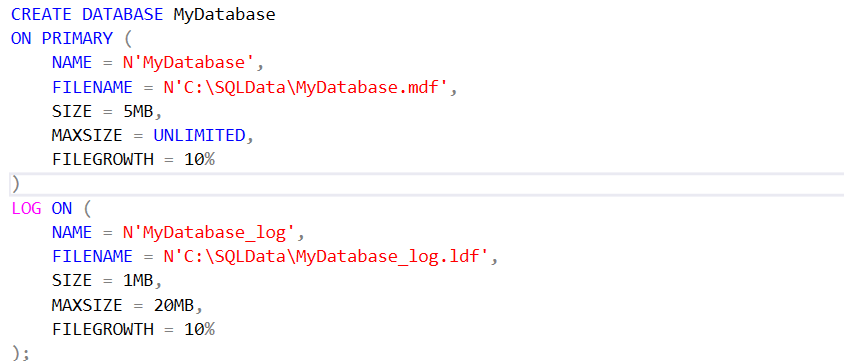
Create file encountered operating system error 5(access is denied.) while attempting to open or create the physical file in SQL Server

The operating system error 5 (Access is denied) in SQL Server indicates a permissions issue when SQL Server tries to access or create a file. This error usually occurs when SQL Server doesn’t have the necessary permissions to the file or folder in question.so we can give full control permission to SQL service account.

Here are some steps to resolve this issue:

  1. Verify File and Folder Permissions
    Ensure that the SQL Server service account has the necessary permissions to access the directory and file.
  2. Open SQL Server Configuration Manager.Navigate to SQL Server Services.Check the Log On As column for the SQL Server instance. Note the service account (it could be NT Service\MSSQLSERVER).
  3. Grant permissions:Right-click on the folder where the file is located or will be created.
  4. Select Properties>Go to the Security tab>Click Edit and then Add.
  5. Enter the SQL Server service account and Grant Full Control permission.
  6. Verify SQL Server File Path
    Ensure that the path specified in your SQL command is correct and accessible.
  7. Verify User Permissions
    Ensure the user running the SQL Server Management Studio (SSMS) or the SQL script has appropriate permissions.
  8. Run SSMS as Administrator
    Sometimes running SQL Server Management Studio as an administrator can resolve permission issues.

Summary:
The primary cause of this error is a permissions issue. By ensuring that the SQL Server service account has the necessary permissions to the file or folder, you should be able to resolve the error. If the problem persists, checking the SQL Server error logs and verifying user permissions can help identify and address other potential issues.